
Thanks for being a SwitcheOn customer. Your new thermostat supports many different types of installation. This page covers basic installation for an analog (multi-wire) HVAC system. This is applicable to residential, commercial, travel-trailer, RV and boat installations as long as they have individual wires for each function.
SwitcheOn works with 24Vac and 12Vdc systems, the most common for commercial, residential and mobile HVAC systems. It does not work with and should not be connected to 115V or greater AC systems.
The SwitcheOn Smart Thermostat requires a common (neutral/ground) wire for operation. It will not function without one. This wire is usually blue and connected to the C terminal. If you do not have a common wire, you will need to install new thermostat wire to use SwitcheOn.
Always turn off the circuit breaker to your HVAC system before working on your thermostat.
TAKE A PICTURE OF YOUR EXISTING INSTALLATION BEFORE REMOVING ANYTHING!
Please refer to the basic installation guide for mounting and power wiring instructions. The following is specifically for heat pump installations.
Before installation you need to examine the settings in your existing thermostat. In particular, you need to determine whether your reversing valve is activated for heating or cooling. Most systems use the reversing valve to call for cooling, but you should verify that yours operates this way.
In general, change-over to cool, has the O/B or reversing valve on an orange wire and change-over to heat has the O/B or reversing valve on a blue wire.
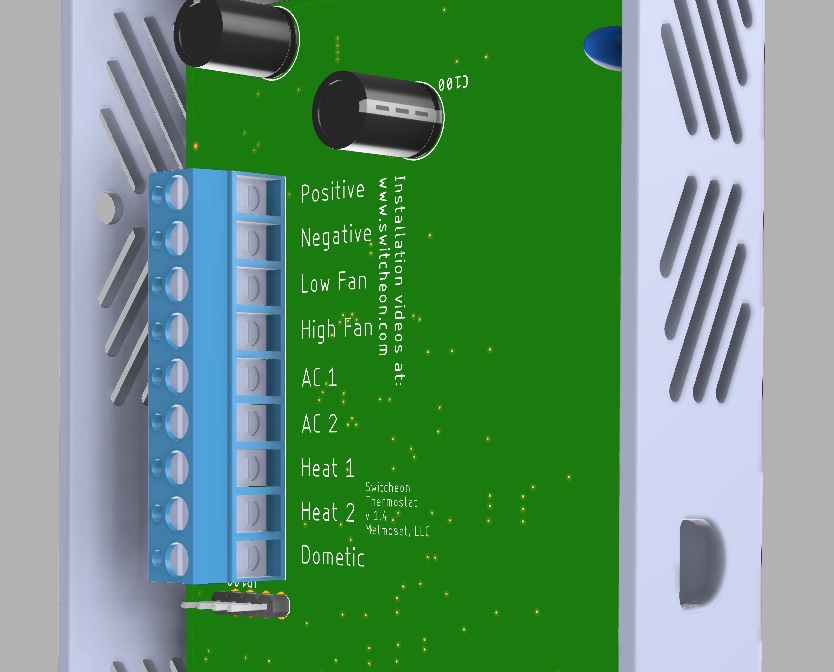
Compare your wires, where they’re currently connected, this table and the back of SwitcheOn to confirm that the necessary wires are present.
The following is only for heat pumps!
| Color | 2nd Color | Name | Function | SwitcheOn Connection |
|---|---|---|---|---|
| Red | Red | R | Power | Positive |
| Blue | Black | C | Common | Negative |
| Green | Green | G | Fan | Low Fan |
| Orange | Blue | O or B | Reversing Valve | Heat 1 |
| White | White | Aux or E | Aux Heat | Heat 2 |
| Yellow | Yellow | Y or Y1 | Cool | AC 1 |
| Yellow | Yellow | Y2 | Cool 2 | AC 2 |
Once connected, you will have to configure SwitcheOn for your heatpump.
Tap the Gears icon in the top right and then tap System Config to enter the system configuration menu.
Enable Heat pump by tapping the row or the switch. Scroll down by sliding the entire screen with your finger. If your Heat Pump O/B line or reversing valve triggers cooling, also enable the “HP – O/B Cool”. Finally, if you want the system to only use your backup heat source, for example during the winter time, enable “HP – Use Emer.”
Recent Comments