
Thanks for being a SwitcheOn customer. Your new thermostat supports many different types of installation. This page covers basic installation for an analog (multi-wire) HVAC system. This is applicable to residential, commercial, travel-trailer, RV and boat installations as long as they have individual wires for each function.
SwitcheOn works with 24Vac and 12Vdc systems, the most common for commercial, residential and mobile HVAC systems. It does not work with and should not be connected to 115V or greater AC systems.
The SwitcheOn Smart Thermostat requires a common (neutral/ground) wire for operation. It will not function without one. This wire is usually blue and connected to the C terminal. If you do not have a common wire, you will need to install new thermostat wire to use SwitcheOn.
Always turn off the circuit breaker to your HVAC system before working on your thermostat.
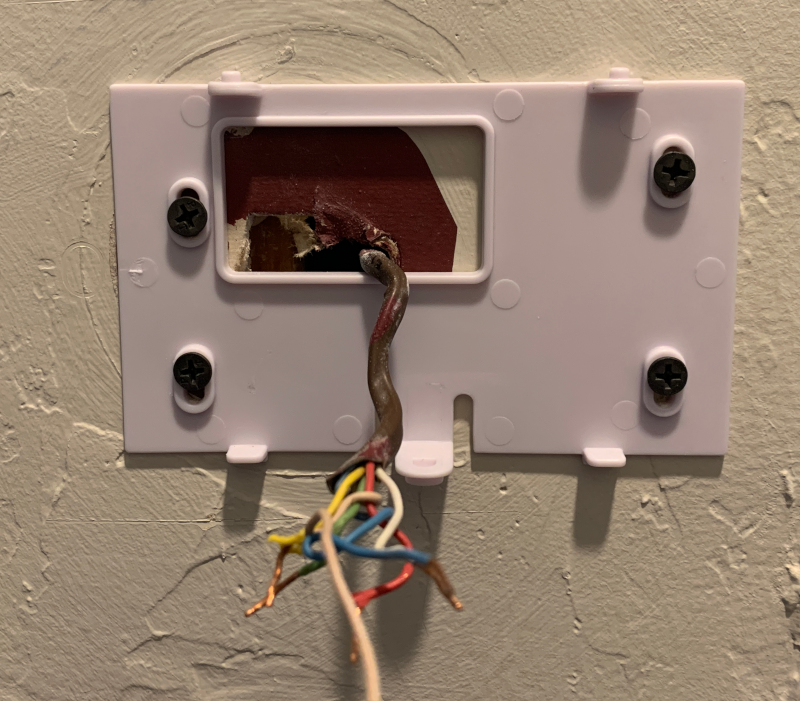
TAKE A PICTURE OF YOUR EXISTING INSTALLATION BEFORE REMOVING ANYTHING!
Take me to the wiring diagram!
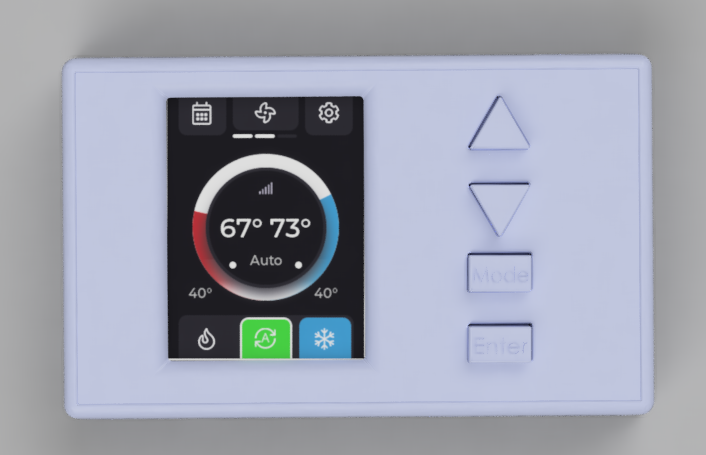
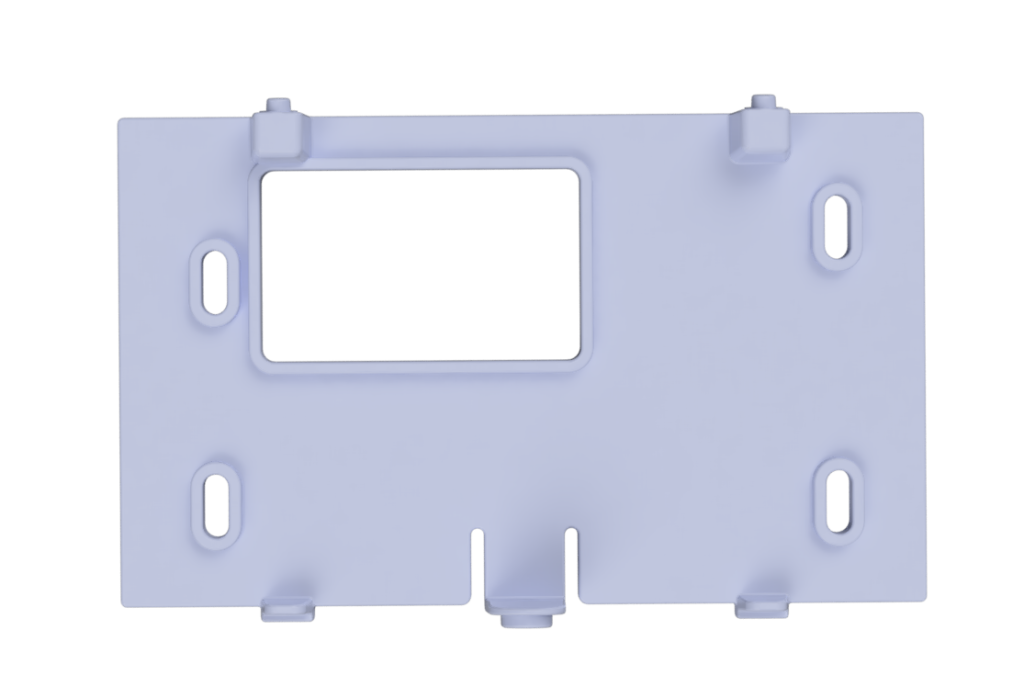
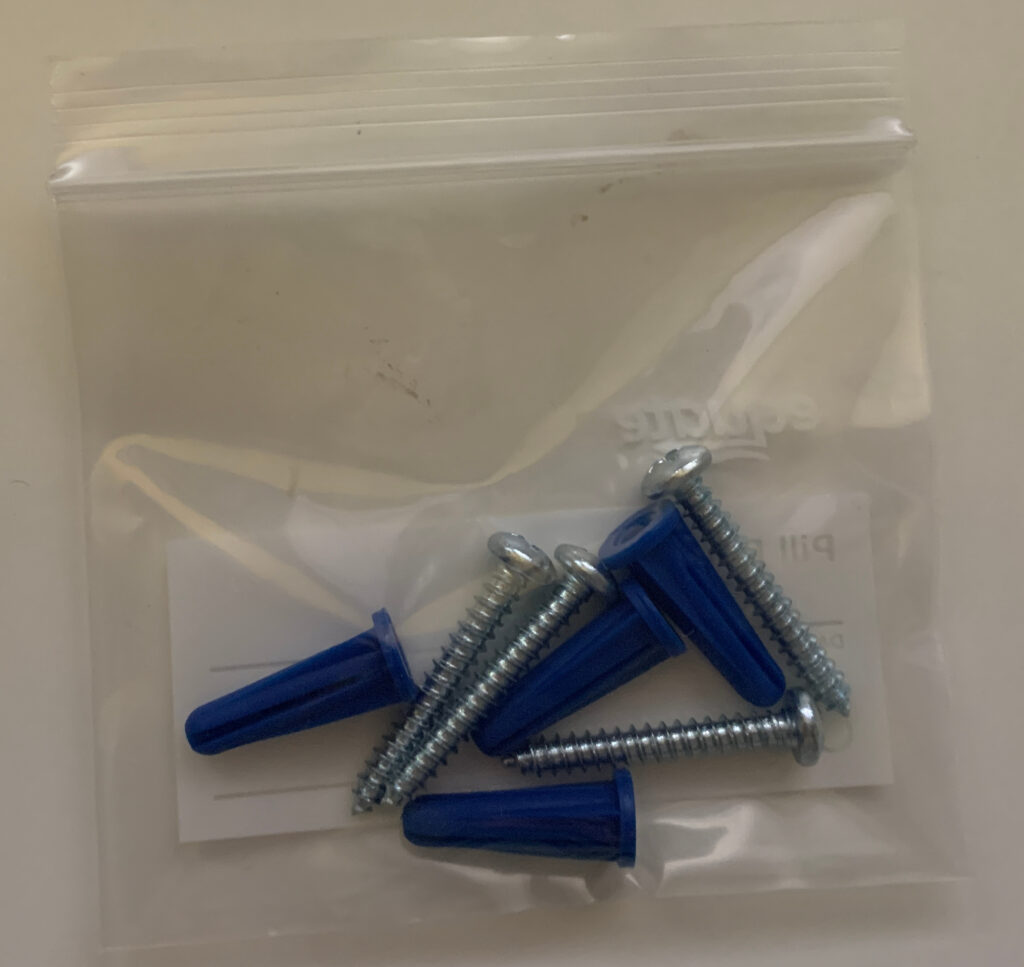
Thermostat contents:
| Unit: | Mounting base: | Mounting anchors and screws: |
|---|---|---|
 |
 |
 |
Required tools:
- #1 Phillips screwdriver
- 1/8″ or 3mm Slotted screwdriver
- Level
- Pen/Pencil
Before starting your installation, turn off the circuit breaker to your HVAC system. You can usually find this in your breaker panel. Once this is off, your existing thermostat should turn off or indicate power failure and your HVAC will stop operating.
Now, remove the top of your existing thermostat and TAKE A PICTURE BEFORE REMOVING ANY WIRES!
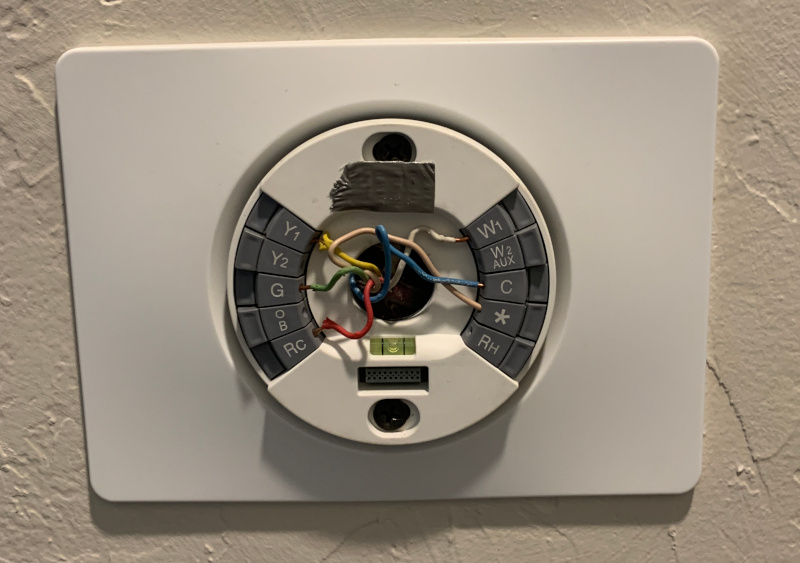
This table gives the most common wire colors and their normal uses. Compare your wires, colors and existing thermostat to determine if yours has been wired in the “standard” way. Many are not and will require further examination before connection.
If you have wires connected to terminals not listed on the below table, or colors that don’t match, you might need the heat pump instructions or to contact support for assistance. Tap “Contact” above to send us a message and we’ll get back to you quickly. If you provide a phone number, we’ll call you back, usually within a few minutes. We’re here to help you.
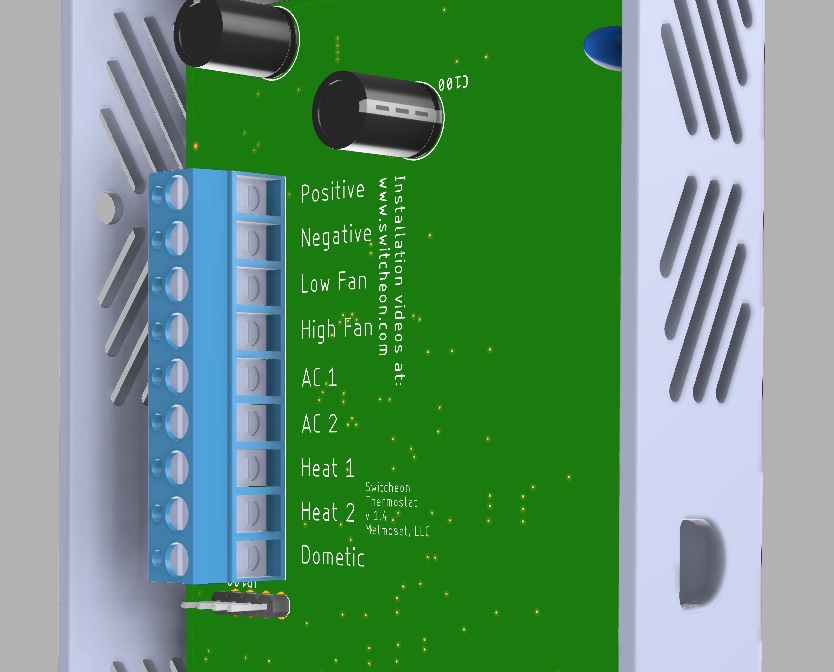
Note: Due to supply chain constraints, there are two different versions of the SwitcheOn thermostat main circuit board. Some units have Positive as the first wire and some have Negative as the first. The labels on the back of your unit are correct. Connect the wires to the screw terminals with matching labels and your SwitcheOn will work correctly.
Wiring diagram:
| Color | Name | Function | SwitcheOn Connection |
|---|---|---|---|
| Red | R | Power | Positive |
| Blue | C | Common | Negative |
| Green | G | Fan | Low Fan |
| White | W | Heat | Heat 1 |
| Yellow | Y or Y1 | Cool | AC 1 |
If you have a heat-pump, your wiring will be different.
Click here for Heat-pump Connection Instructions.
Compare your wires, where they’re currently connected, this table and the back of SwitcheOn to confirm that the necessary wires are present.
Before removing your old thermostat base, check that your wires are secured inside the wall. Usually they are and won’t be able to fall inside. If they aren’t secured inside the wall, tie some string to the end of the wires, preferably with electrical tape to ensure you can pull them back up.
Once you’ve confirmed your wires, it’s time to remove your old thermostat. Most of the time, they’re installed with a couple of drywall screws. Disconnect the wires first and pull them out through the hole in your existing mounting plate. Then remove the screws and the plate should pull away from the wall.
SwitcheOn is designed to be mounted either with the included screws and anchors into drywall, or with standard drywall screws into a stud. If there is no stud available behind your thermostat mounting area, you should use the anchors and included screws to ensure your SwitcheOn is securely mounted.
Once you’ve decided how you’re going to mount your SwitcheOn thermostat, it’s time to place it and mark your screw holes. Place a level on top of the SwitcheOn base and hole it up to your wall, with the wire hole located inside the wire hole of the mounting plate.

The mounting holes in the SwitcheOn base are oval shaped to allow you to make fine adjustments once the screws have been installed and before they’ve been tightened.
If you’re using the anchors, mark the wall with a pen or pencil in the center of each mounting hole. Remove the mounting plate and use the #1 phillips screwdriver to bore holes in the drywall at each mark. Press the anchors in with your thumb.
If you’re not using anchors, or once you have the anchors pressed in, place the mounting plate back on the wall and install the screws. Leave them a little loose so the position of the device can be adjusted.
Place the level on top of the SwitcheOn base one more time, adjust it to perfection and tighten the screws.
Now, it’s time to install the wires. We suggest taking a moment to untwist and organize your wires. After many years, thermostat wires are often messy and wrapped around each other. This makes installation needlessly difficult.
Insert the wires one at a time into the terminals and tighten with a 1/8″ slotted screwdriver.
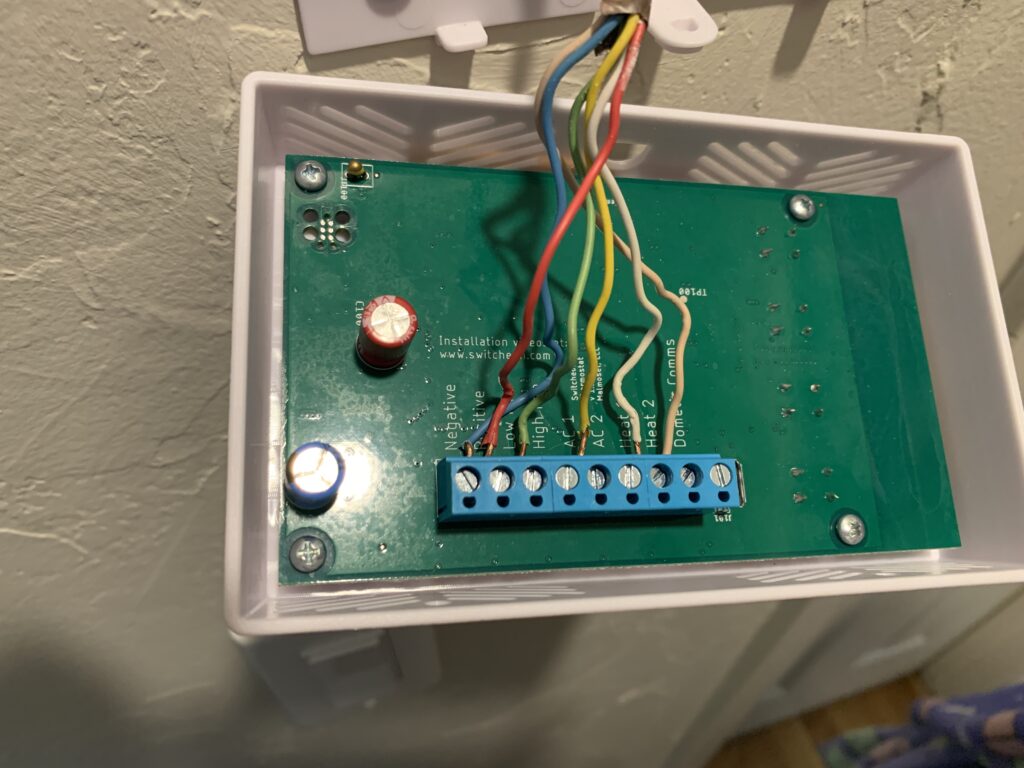
With the wires connected, bend them all near the bottom of the unit, push the extra back into the wall and hang SwitcheOn by the top posts. Once the bottom is clipped, SwitcheOn can be difficult to remove. This is by design so it doesn’t fall off when used in an RV. With SwitcheOn hanging from the top posts, turn your HVAC breaker back on.
With power on, SwitcheOn should start up and present you with the normal thermostat screen.
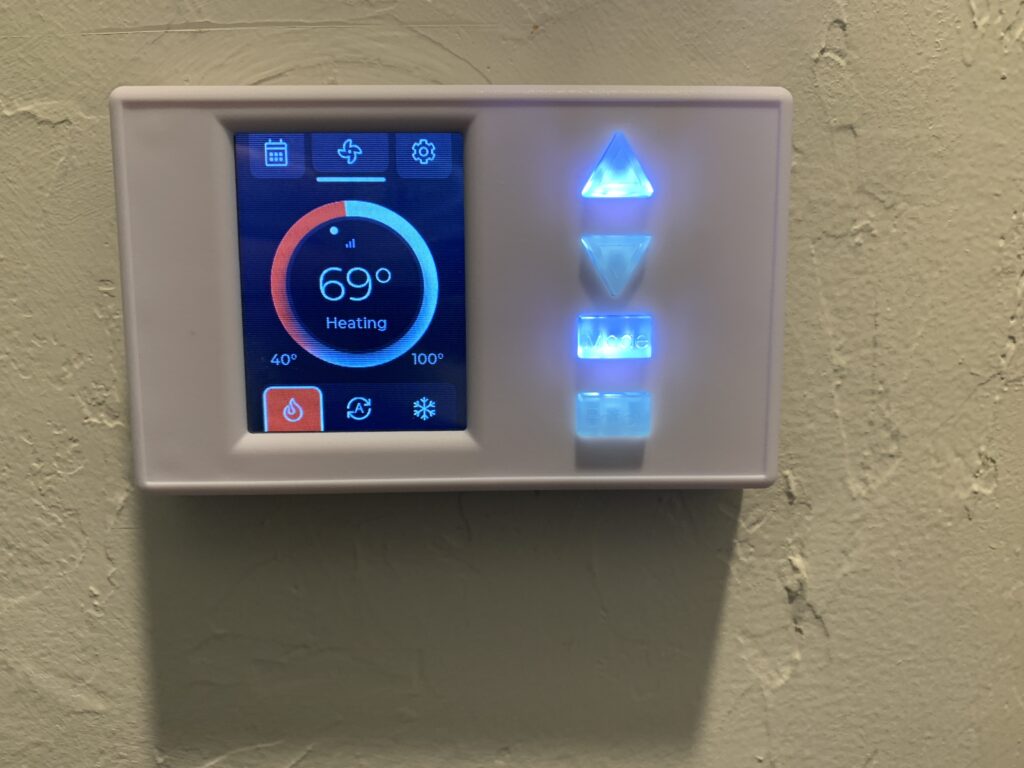
Test each function, Heat, Cool and Fan by tapping the mode buttons. You can also test the Auto mode by tapping the Auto button in the center.
After first being powered up, SwitcheOn will occasionally display the device QR code to be scanned with the mobile app. If you need to view this code again, Tap the Gears icon in the top right of the home screen and then tap App Connection to view the code. Scanning the QR is required once for cellular activation which usually takes few minutes but can take up to 8 hours. Cellular service is only required if you want to use the remote app to control your thermostat and is included for the first 12 months.

Go to your devices app store, Google Play or Apple App Store and download the SwitcheOn App. Tap Add or the + in the top right of the app and allow the app to use your camera. Point your phone camera at the code on your SwitcheOn device to add the thermostat to the app. You may share the QR code from the thermostat or the app with as many other users as you wish.
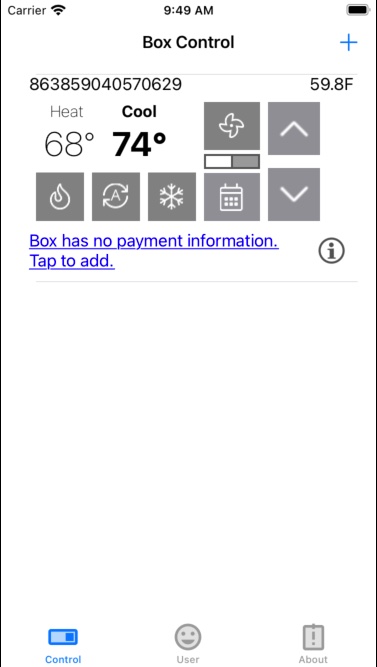
From here, all of the thermostat controls are available. Tap a temperature to adjust with the UP and Down buttons. Mode selection is the same as the thermostat, with Heat, Auto and Cool modes available along the bottom. The Calendar icon on the right allows programming by Date, Time, and Day of week. Fan only mode can be engaged by tapping the Fan at the top. If you have a multi-speed fan, this button also allows selecting a fan speed.
If you have any questions, feature requests or suggestions, please feel free to contact us. We’re here to help and want you to enjoy your SwitcheOn product.
Recent Comments